"Five cats" painting process
Once upon a time I thought cutting my own mats would be beneficial. I no longer remember what made me think that, other than that they would be immediately available instead of going through the somewhat irritating process of ordering them from my art supplier, at the same cost no less. Worse, I found cutting them nearly impossible with clean cuts, and being impatient, I returned to ordering my mats like a sane person. Leaving the mat boards, 60×80cm black boards with white core, unemployed. I had read about people using them to draw and paint on but the foamy core made me sceptical. Still - nothing ventured, nothing gained, and I used a mat board for this painting, to be entered into an international art magazine's competition (sadly I was not chosen as a finalist).
 |
| While the format seemed nice at first, for easier storage and handling, I cut it to 50×70cm. |
 |
| Some time ago I went into the habit of collecting my leftover paints into a jar for further use, and use the greenish grey as an underpainting, mixed with gesso and a bit of water. Three layers is enough for me. |
The painting is based on a quick, moody sketch I made a few weeks earlier and revisited with more detail and lighting. I then made a 3D model in Blender, using a DAZ character and a few free models and kits I found online. These models are never really fancy because there is always a 3D technique I am not entirely familiar with. I am usually reluctant to even show them, but let's dare something here.

The face is a feature of DAZ to transfer a likeness to a character model. It has its drawbacks - smiling portraits for example are difficult because DAZ has its own expression parameters that don't always allow to change the expression very well - but overall it's very useful if you tend to draw faces the same every time. Finally I shoot some photos of me draped in a blanket for a dress to get nice folds and collect some cat photos (I have several cats but of course you never have the ref you need, and cats are notoriously bad at posing the way you want them to). A not too detailed drawing and colour sketch are created in Photoshop, and I use a newfound free tool, photoraze.com, that cuts the drawing into pieces for printing. After taping the pieces together, given the medium dark underpainting, I use tailor's white transfer paper to transfer the drawing with a ballpoint pen.

I know many painters start with the face because viewers are so drawn to it. I often think I should too, but to be honest, the face is rarely the most interesting thing to me and I tend to slack off on other parts if one takes so much effort, so I start with those parts that are in the highest danger of being slacked off on. I add first washes to the background and mossy rocks, and use a diluted dark mixture to put in the branches before I lose them. Some of the darkest darks are added to the characters as well. I work on these parts for a while, making the odd stroke on the dress or cats every now and then.
The rocks are painted by stippling with old hogs-hair brushes and almost unmixed combinations of greys and browns. It's a bit thicker than it needs to be, but a little impasto is okay. The moss is from adding wavy lines with a filbert and dragging the paint into the shadows. I rarely paint this wet on wet but rather wet on damp.

I re-transfer the folds when I lose them and work a bit on the cats. Still unhappy with the background gradient, and I mask the trees to make more of an effort. So far I have made barely a stroke on the skin and am amazed how flesh-like the grey looks against the dark greens. Talk about simultaneous contrast doing the work for you.
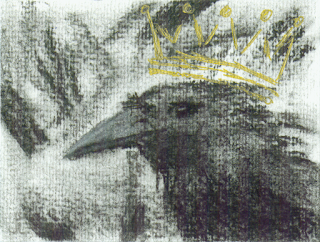
With the background nearly finished I turn towards finishing the characters. There's something wrong with some of the cats' features or paws which I correct, some bits are added to the moss, fallen leaves and other details I attack whenever I find them. I want to add gold ink to the characters, and paint the areas with yellow ochre first as a base.


Scanning this takes effort by walking around my scanner with the board. Six pieces are stitched together, re-opened as RAW file for colour corrections (scanning in pieces often make the single bits look slightly different). My biggest challenge it to take out the visible brushstrokes that are over-pronounced from the scan. And here we are!
Bottom line about the mat board: it's actually a good canvas. I had only used a small sheet before this painting and found that very slippery, but better gessoing got rid of that problem. It didn't buckle at all, which my very wet painting style often does to the thickest of cartons otherwise.
 |
| The bright stripes on the sides are the tape with which it holds to the board. |


Comments
Post a Comment